

Shipping inventory to Amazon FBA requires strict compliance with Amazon’s prep, packaging, and labeling requirements. In this step-by-step guide, I’ll show you how to ship to Amazon FBA, from creating a shipping plan account to tracking and reconciling shipment. I also discuss some ways to optimize Amazon shipping costs, avoid FBA fulfillment fees, and prevent delays caused by labeling or routing errors.
Before you ship to Amazon FBA
Before sending any inventory to Amazon fulfillment centers, it’s essential to understand the rules around what you can ship and how it must be prepared. FBA has strict requirements designed to streamline its fulfillment process and maintain customer trust. If your products don’t meet these standards, they could be delayed, rejected, returned, or even disposed of, often at your expense.
The two most important areas to get right before shipping are:
- Product eligibility: This includes understanding what’s restricted, what requires approval, and how expiration or meltability affects shipment windows.
- Inventory requirements: These cover everything from how you name, package, and label products to how your shipment is routed and tracked through fulfillment centers.
Let’s walk through each of these areas so you can confidently prepare your inventory for Amazon FBA.
FBA product eligibility and restrictions
Make sure you’re familiar with FBA product restrictions before sending your products to fulfillment centers. Some items require approval, while others are restricted or prohibited outright.
- FBA product restrictions: Not all products sold on Amazon are eligible for FBA. Items must comply with labeling, packaging, and quality standards, including expiration and temperature guidelines. Some prohibited items include alcoholic beverages (including non-alcoholic beer), vehicle tires, gift cards or certificates, loose batteries, products deemed unsuitable by Amazon, and more. Check out Amazon’s full list of FBA prohibited products.
- Meltable product policy: Amazon only accepts meltable products, such as chocolate, gummies, and wax-based items, from October 16 to April 14 every year. Items arriving outside this window may be disposed of at your expense. Products must withstand up to 155°F/69°C. You can refer to the current meltable ASIN list to verify eligibility — this is continually updated by Amazon.
- Expiration-dated products: Any product with a shelf life or reduced effectiveness over time is considered expiration-dated, even without a labeled expiry date. Examples include consumables (e.g., chips, tea, supplements), topicals (e.g., soaps, cosmetics, sprays), cleaning products, products with a period-after-opening (PAO) symbol, and bundled items with expirable components (e.g., coffee machines with coffee). The shelf-life rule is that items must be consumable within their use period plus 90 extra days at check-in. For instance, a supplement with 240 servings must have at least 330 days of shelf life remaining.
FBA inventory requirements
The next step you need to do is to familiarize yourself with these eight core requirements for FBA inventory. Knowing these requirements will greatly help ensure a smooth Send to Amazon workflow.
- Product titles: Titles must follow Amazon’s global standards. Keep them under 200 characters, avoid promotional terms (like “free shipping”), and include key identifiers (e.g., “hiking boots”). Decorative characters are not allowed. Noncompliant titles can cause your listings to be suppressed.
- Item condition: To sell products as new, they must arrive in flawless, unused condition. Scratches, wear, or damage may lead to rejection. If your item is labeled ‘used’, it’ll be marked as unsellable only if it’s defective, unusable, mislabeled, or missing parts. Note that most carriers assume limited liability for damage or loss in transit, depending on the cause.
- Packaging and prep: Inventory that’s incorrectly prepped and labeled may incur a preparation fee. Amazon may also refuse, return, or repackage your inventory at your expense. Packaging and prep requirements depend on the specific products. Examples include loose products, sold-as-set products, boxed units, poly-bagged units, and cased-box products. I discuss best practices in detail in Step 2.
- Barcodes: Each item sent to an Amazon fulfillment center requires labeling with either a manufacturer barcode (UPC, EAN, JAN, ISBN) or an Amazon barcode (FNSKU). A manufacturer barcode is used by default to track eligible inventory throughout the fulfillment process, unless the item is ineligible (e.g., restricted, media, or expirable items). If no manufacturer barcode is available, you can apply Amazon barcode labels yourself or use Amazon’s Label Service for a fee.
- Shipping labels: Each box must have a shipping label and an FBA box ID label on the outside of the box. You can ship via small parcels or consolidate boxes on pallets (less-than-truckload or LTL, or full truckload or FTL). Pallets require four scannable ID labels (one per side). Mislabeled boxes or missing labels may prevent future shipments.
- Shipping and routing: Each shipment must follow Amazon’s routing guidelines. Issues like oversized boxes, improper labeling, or policy violations may result in rejection. All shipments need a dock appointment — carriers without one will be turned away. If you’re dropshipping, ensure your distributor applies the correct FBA labels. Limited label permissions can be granted through Seller Central.
- Inventory storage limits: Storage applies across seven types: standard-size, oversize, apparel, footwear, flammable, aerosol, and extra-large. Check your limit in Seller Central: Inventory > Inventory Planning > Performance. Exceeding your limit blocks new shipments. To reduce inventory, sell, return, or create a removal order. Storage limits depend on seller type and performance:
- Individual sellers: Fixed limit of 10 cubic feet.
- Professional sellers: No fixed limit if IPI score meets Amazon’s threshold. Otherwise, a minimum of 25 cubic feet per storage type.
- Box content information: Box content info ensures faster check-in. Without it, you may face manual processing fees or shipment restrictions. Use the Send to Amazon workflow to provide this info via a packing template.
Step 1: Create a shipping plan
Creating a shipping plan is the first step — a critical step — in sending your products to Amazon FBA. It’s where you specify what you’re shipping, how it’s packed, and where it’s coming from. This step happens in Amazon’s Send to Amazon (STA) workflow and involves several sub-steps depending on whether you’re shipping small parcels or pallets.
Below is a step-by-step breakdown of how to create a shipping plan, including the decisions you’ll make and tips to keep things moving efficiently.
Choose inventory
To begin creating your shipping plan, log into Seller Central and navigate to Inventory > Shipments, then click Send to Amazon. This opens the shipment creation workflow known as Send to Amazon (STA).
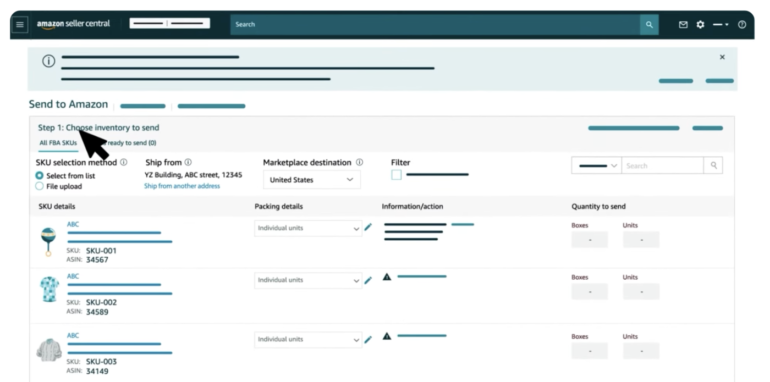
You’ll see a list of your SKUs that have been converted to FBA. If any products are missing, you’ll need to convert them to Fulfillment by Amazon first through the Manage Inventory page. Only FBA-enabled listings will appear here.
Next, enter your ship-from address — this can be your business, a warehouse, or even your supplier’s location. This information tells Amazon where your inventory is coming from so they can determine the best fulfillment center routing.
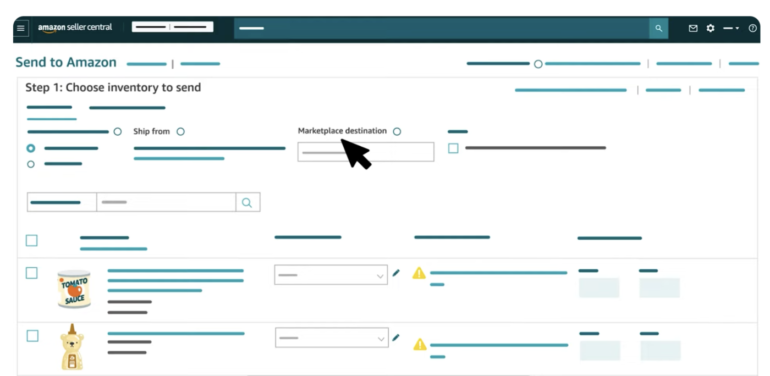
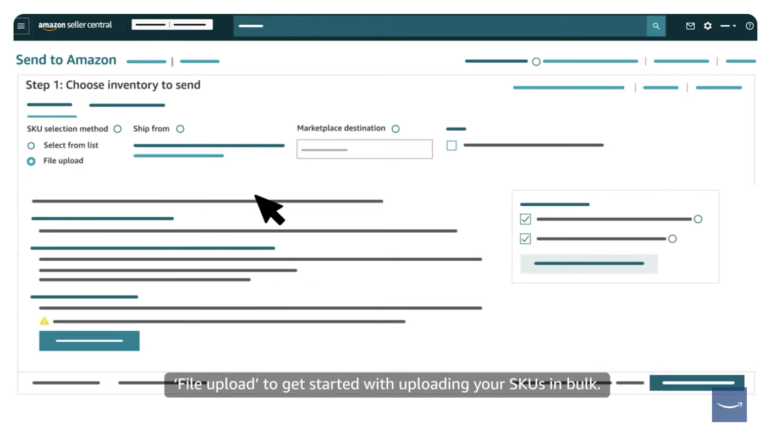
You’ll also be asked to select a packing type, which determines how Amazon expects to receive your inventory:
- Individual products are single units with varying SKUs or conditions, packed separately or together in mixed cartons. This is the most common format for smaller sellers or product assortments.
- Case-packed products refer to manufacturer-prepared cartons that contain identical SKUs in consistent quantities and conditions. Each case must contain the same number of units.
After setting your inventory selections and packing type, click Continue to move into the rest of the workflow. If you selected “individual products,” the step below will appear next.
Pack individual units (if applicable)
This step is required only when you’re sending individual products — that is, shipments containing multiple SKUs with different attributes or prep requirements. In this step, Amazon helps you organize how those items should be packed based on FBA guidelines.
Amazon will automatically group your SKUs into pack groups. These groupings are based on how the products must be handled at the fulfillment center. For example, products flagged as hazardous materials (hazmat) must be sent to specialized centers and can’t be packed with other goods. Similarly, oversized items are routed to specific facilities and must be boxed separately from standard-sized units.
Products requiring Amazon prep or labeling also need to be isolated from those that are already prepared. This minimizes delays at the fulfillment center by allowing boxes to flow through receiving more efficiently.
Once your pack groups are generated, you’ll need to provide box content information for each one. You have three options for submitting this data:
- Web form: Recommended for shipments with fewer than 12 units. You’ll manually enter quantities, box weights, and dimensions for each pack group.
- Excel file upload: Ideal for bulk shipments. Amazon provides a downloadable template where you list SKUs, quantities per box, and box dimensions. Once completed, you’ll re-upload and validate the file.
- Amazon manual processing: For a per-unit fee, Amazon will handle the box content declaration. This is useful if your packing is handled by a distributor or if you prefer not to track the contents box by box.
Never mix SKUs from different pack groups in the same box. Doing so can delay check-in and affect inventory availability. Also, clearly mark each box (e.g., “Pack Group 1 – Box 1”) to ensure it aligns with the correct FBA box ID label in Step 3.
If you need to adjust SKU quantities during packing—such as replacing damaged items or optimizing box space—you must return to Step 1 and update your shipment. Keep in mind that changing quantities may re-trigger the pack group logic, so you’ll need to re-enter or re-upload your box content information accordingly.
Once all pack groups have been packed and their box data submitted, click Confirm and Continue to proceed to the next step: Confirm shipping.
Confirm shipping
Once you’ve finalized your inventory selection and provided box content details, the next step is to confirm your shipping details. Here, Amazon asks you to enter an estimated ship date, the date your shipment will be ready for pickup or drop-off. This helps Amazon anticipate incoming deliveries and manage fulfillment center workload.
While this may seem like a simple date input, it plays a crucial role in preventing delays. Accurate planning ensures your inventory is checked in faster, becomes available for sale sooner, and helps you avoid performance penalties tied to inbound shipment processing.
Choose a realistic date that aligns with when your boxes will actually be picked up or dropped off. If you’re using a third-party prep center or dropshipping from a supplier, confirm their lead times before entering this.
After confirming the ship date, you’ll be prompted to select your preferred shipping method in the next step.
Confirm shipping method
In this step, you’ll choose how your shipment will physically reach Amazon, either as Small Parcel Delivery (SPD) or Less-than-Truckload (LTL):
Small Parcel Delivery (SPD): SPD is the default option for most sellers. It involves shipping individual boxes — typically through UPS, FedEx, or Amazon-partnered carriers.
- Enter the number of boxes in your shipment.
- Input the weight and dimensions for each box.
- Amazon will calculate estimated shipping charges if you’re using a partnered carrier.
- Accept the charges and proceed to label printing.
Less-than-Truckload (LTL): If your shipment is palletized and weighs over 150 lbs in total, LTL may be a more cost-effective option. This method is often used by high-volume sellers or those using third-party logistics providers.
- Enter the number of pallets, their weights, and dimensions.
- Provide a freight-ready date — the date your pallets will be ready for pickup.
- Specify whether your pallets are stackable, which affects how they’re handled in transit.
- Select your carrier or choose Amazon-partnered freight.
If you’re not using a partnered carrier, you must supply your own Bill of Lading (BOL) and freight details. Whether SPD or LTL, all carriers must have a dock appointment scheduled in advance. Shipments without appointments will be rejected by the fulfillment center.
Print labels
After confirming your shipping method, Amazon will generate the required shipping and FBA box ID labels for your shipment.
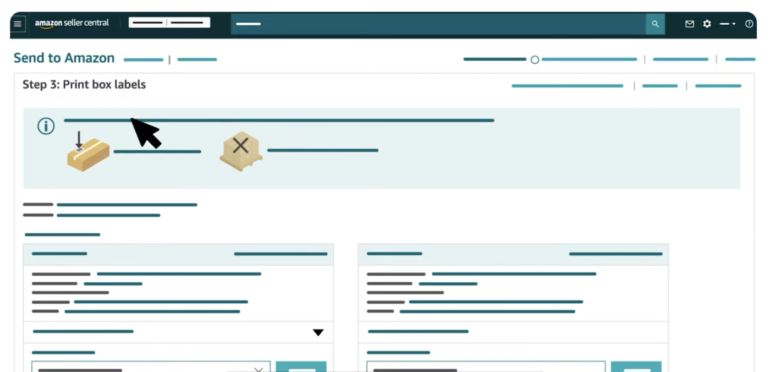
For SPD shipments:
- You’ll receive two labels per box: a carrier label for UPS/FedEx and an FBA box ID label used by Amazon to identify and scan the box on arrival.
- Each label is unique — never photocopy or reuse them.
- If you change the number of boxes after label generation, you must reprint the entire set.
For LTL shipments:
- Print and attach four pallet labels per pallet—one on the top center of each side.
- Ensure labels are printed clearly and securely attached to flat, visible surfaces.
- Use laser printers, print at 300 DPI, and avoid placing labels near seams or under tape.
Labeling best practices:
- Labels must be placed on a flat, smooth area of the package.
- Keep labels at least 1.25 inches from the edges and avoid placing them over seams or corners.
- Remove or cover all non-Amazon barcodes (e.g., manufacturer UPCs) with opaque tape or a marker to prevent scanning errors.
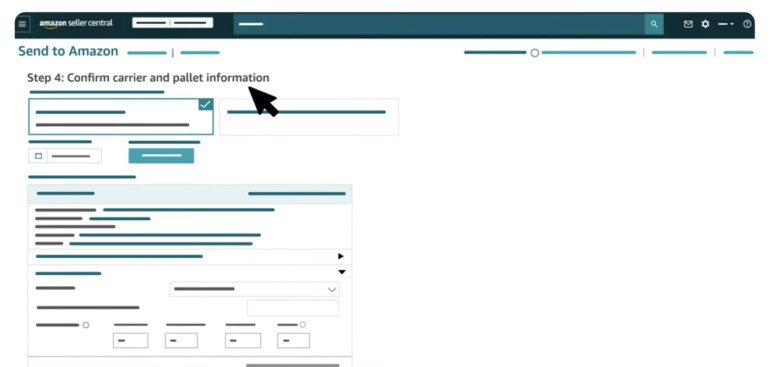
Finalize pallet details (LTL only)
If you’re shipping via Amazon-partnered LTL, this step ensures your freight information is complete and accurate:
- Enter your freight-ready date, total number of pallets, pallet height/weight, and whether they are stackable.
- Print your pallet labels and affix them correctly.
- Tracking will update automatically once the carrier picks up your freight.
If you’re not using a partnered carrier, your final responsibility in this step is to upload the BOL and provide the freight class. You’ll also need to share this information with the carrier so they can schedule pickup with Amazon.
Skipping this step or failing to provide BOL/freight details may result in missed pickups or refused shipments.
Step 2: Pack and label your products
After you’ve created and finalized your shipping plan, it’s time to physically prepare your products for shipment. This step involves proper packaging, labeling, and compliance with Amazon’s FBA guidelines.
Packaging best practices
- Use new, rigid, six-sided boxes with intact flaps.
- Boxes should be filled with enough packing material to prevent collapse when stacked.
- Do not exceed 25 inches per side for standard and oversized boxes unless required.
- Box weight must match the information in your shipping plan; do not exceed 50 lbs per box unless shipping a single oversized unit.
- If reusing boxes, remove old labels and barcodes completely.
Labeling your products
- Each unit must have either a manufacturer barcode (UPC, EAN, JAN, ISBN) or an Amazon barcode (FNSKU).
- Products not eligible for commingled inventory must be labeled with an Amazon barcode.
- Use laser printers with a minimum of 300 DPI resolution to print labels.
- Labels must be scannable, include the correct FNSKU, and indicate product condition (e.g., “New” or “Used”).
- Affix labels to flat, smooth surfaces — never on seams, corners, or curves.
- Cover any existing barcodes on the product packaging with opaque tape or a black marker.
TIP: You can use Amazon’s Label Service to apply labels for a per-unit fee. This is especially helpful for high-volume shipments or if you use third-party prep services.
Labeling boxes and pallets
- Each box must have: a carrier label (e.g., UPS or FedEx) and an FBA box ID label, provided during shipment creation.
- For palletized LTL or FTL shipments, apply four identical pallet labels (one on each side of the wrapped pallet).
- Do not reuse labels. If any shipment details change, reprint the full set of labels.
Step 3: Send your shipment
Now that your inventory is packed and labeled, it’s ready to be handed off to the carrier. This step focuses on ensuring your shipment meets Amazon’s inbound routing and delivery standards.
- Choose your shipping method:
-
- Small Parcel Delivery (SPD): Ideal for shipments of individual boxes. Commonly uses UPS or FedEx.
- Less-than-Truckload (LTL) or Full Truckload (FTL): For palletized shipments exceeding 150 lbs. Ideal for large or wholesale inventory transfers.
- Schedule a dock appointment: Required for all LTL and FTL shipments. Carriers without a scheduled appointment will be turned away.
- Confirm your ship date: Ensure it aligns with your actual pickup or drop-off date.
- Verify labels match the packing list: Box content mismatches can lead to check-in delays or inventory rejection.
- Use the correct packaging method: Ensure all goods are bagged, bubble-wrapped, or boxed according to product type (e.g., liquids, apparel, fragile goods).
- Avoid combining incompatible SKUs in one box (e.g., hazmat with standard products).
TIP: If your supplier or distributor is handling delivery, make sure they have access to the correct box ID and pallet labels. You can grant limited label permissions in Seller Central.
Sustainability in shipping
Choosing the right shipping method isn’t just about cost and speed; it’s also an opportunity to reduce your environmental impact. Amazon encourages sellers to adopt more sustainable practices when preparing and sending FBA shipments, such as these tips:
- Consolidate shipments: Fewer, larger shipments help reduce the number of carrier trips, lowering overall emissions.
- Use right-sized packaging: Avoid oversized boxes and excessive void fill. Dimensional weight charges aside, tighter packaging reduces waste and optimizes carrier capacity.
- Choose recyclable materials: Opt for corrugated boxes and paper-based filler over plastic-based materials. Avoid foam peanuts or mixed-material wraps.
- Reduce repacking risk: Ensure your products are correctly prepped the first time to avoid Amazon repackaging them, often with new materials you didn’t choose.
- Ship from closer fulfillment sources: If working with 3PLs or dropshippers, choose facilities closer to Amazon’s fulfillment centers to minimize transport distance.
- Use Amazon’s partnered carriers when possible: They’re often optimized for multi-shipment routing, reducing redundant trips and emissions compared to piecemeal delivery strategies.
Step 4: Track and reconcile the shipment
After your shipment has been picked up or dropped off, you’ll want to monitor its progress and confirm that Amazon receives it correctly. Use the Shipping Queue or View Summary page in Seller Central to track shipment status.
- For SPD shipments: If you used an Amazon-partnered carrier, tracking is automatic. If not, you must manually enter tracking numbers.
- For LTL/FTL shipments: Submit the Bill of Lading (BOL) and freight numbers, as Amazon will use this information to validate check-in at the fulfillment center.
Reconcile discrepancies. If the quantity Amazon receives doesn’t match your shipment plan, you’ll see a notice in the Reconcile tab. Discrepancies may be labeled as:
- Missing: Items not scanned or received.
- Found: Items later accounted for and added to inventory.
- Reimbursed: Amazon accepts fault and credits your account for lost/damaged inventory.
To request an investigation, provide required documentation (e.g., invoices, packing slips, BOLs) and clearly describe packaging and labeling details, especially for boxes with distinctive markings. Note that you must wait 72 hours after delivery before requesting a reconciliation case. This allows time for Amazon to fully check in and scan all boxes.
Cost optimization tips
Shipping to Amazon FBA can get expensive, especially when fees stack up across fulfillment, storage, and transportation. Regularly review your FBA fees in Seller Central under the Payments > Transaction View tab to identify trends or errors. Here’s how to reduce your costs while maintaining compliance in your operations.
- Use Amazon-partnered carriers: These often provide discounted rates for SPD and LTL shipments, especially if you’re shipping from within the contiguous US.
- Consolidate shipments: Fewer, larger shipments are typically cheaper per unit than frequent small batches.
- Right-size your packaging: Oversized boxes lead to dimensional weight surcharges. Match box sizes closely to the volume of your products.
- Avoid overstocking: Storage fees increase if your inventory sits too long. Monitor your sell-through rates and consider using Amazon’s inventory planning tools.
- Weigh and measure accurately: Mismatched shipment specs can trigger unexpected surcharges.
- Use reusable templates: Save and reapply packing templates in the Send to Amazon workflow to speed up planning and avoid rework.
Common mistakes to avoid
Even experienced sellers make costly errors when shipping to FBA. Avoiding these mistakes will help you maintain account health and prevent delays or inventory losses.
- Missing or incorrect labels: Each unit and box must have the correct, scannable label. Cover any other barcodes that could confuse the scanner.
- Packing prohibited items: Shipping restricted or meltable products outside the accepted window can result in disposal fees.
- Using the wrong prep or packaging: Non-compliant packaging (e.g., exposed footwear, loose items, or leaking liquids) can trigger returns or repackaging charges.
- Mixing SKUs from different pack groups: This causes box content mismatches that delay check-in and inventory availability.
- Shipping without a dock appointment (LTL/FTL): Carriers without scheduled appointments will be turned away.
- Skipping box content info: Choosing not to submit this info can lead to processing delays and per-box manual processing fees.
TIP: Keep a pre-shipping checklist for each warehouse or prep partner you work with to avoid repeat errors.
Returns, replacements, and damaged goods
When Amazon handles your fulfillment, they also manage returns and damaged product claims—but you still need to monitor these closely. Review your FBA returns reports monthly to catch trends, such as poor packaging or frequent breakage, and adjust your prep accordingly.
- FBA customer returns: These are processed by Amazon and restocked automatically if the item is in sellable condition.
- Damaged goods: If items are damaged in transit or while at the fulfillment center, you may be eligible for reimbursement — view details under Reports > Fulfillment > Inventory Adjustments.
- Reimbursement process: To request reimbursement, you must submit documentation such as invoices or packing slips. Use the Reconcile tab in your shipment summary for guidance.
- Customer refunds: If you’re using FBA, Amazon will refund the customer and deduct the amount from your account. If the item is returned in poor condition, Amazon may still reimburse you.
Amazon automation and tools to scale
As your business grows, managing FBA shipments manually becomes unsustainable. Automating routine tasks helps you scale more efficiently and minimize human error.
- Inventory management software: Tools like InventoryLab and RestockPro help forecast demand, manage SKUs, and time replenishments. Use Seller Central’s Restock Inventory page to automate replenishment triggers based on sell-through rates and lead times.
- Shipping automation: Platforms like ShipStation help sync shipment planning across multiple marketplaces and streamline labeling.
- Prep services integration: If you use third-party prep centers, integrate them with your shipping plan via Amazon’s limited label permissions and workflow templates.
- Template reuse: Save and reuse case pack templates and shipping plans in the STA workflow to reduce repetitive entry.
Frequently asked questions (FAQs)
How do I create a shipping plan in Amazon Seller Central?
To create a shipping plan, log into Seller Central and go to Inventory > Shipments, then click Send to Amazon. From there, you’ll choose your FBA-converted SKUs, set your ship-from address, pick a packing type, and provide box content info if needed. This is the first part of the Amazon FBA step-by-step shipping process. Once complete, you’ll confirm your shipping method and print your labels.
Can I ship products directly from my supplier to Amazon FBA?
Yes, you can ship directly from a supplier or manufacturer, as long as they follow Amazon’s prep, packaging, and labeling guidelines. Be sure to use their facility as the ship-from address in your shipping plan and grant label permissions in Seller Central if needed. This is often the cheapest way to ship to Amazon FBA, especially if your supplier consolidates and preps the shipment correctly.
What happens if my shipment doesn’t comply with Amazon’s requirements?
Noncompliant shipments may be delayed, rejected, returned, or disposed of—usually at your expense. Common issues include missing labels, mixed SKUs, and improper prep or packaging. These errors can also trigger extra FBA fulfillment fees for manual processing or repackaging. It’s important to follow Amazon’s guidelines closely to avoid shipment penalties or delays.
Are there any restrictions on the types of products I can send to Amazon FBA?
Yes, Amazon restricts or prohibits certain items from being fulfilled through FBA. Examples include alcohol, vehicle tires, gift cards, and meltable or expirable goods sent outside approved timeframes. Always check Amazon’s FBA prohibited list before shipping. Restricted items that are sent without approval may be disposed of or returned.
What is Amazon’s prep service, and should I use it?
Amazon’s prep service handles packaging, labeling, and box content info for a per-unit fee. It’s useful if your supplier can’t prep items or if you want to save time on manual work. While convenient, it can increase your Amazon FBA shipping cost, so many sellers choose third-party prep centers or do it in-house for better cost control.
How long does it take for Amazon to process my FBA shipment?
Most shipments are processed within 3 to 5 business days after delivery, though times can vary. Small parcel shipments using partnered carriers typically check in faster due to automated tracking. If your shipment is delayed or miscounted, you can file a reconciliation case. Accurate labeling and box content info help avoid delays and added FBA fulfillment fees.
Bottom line
Shipping to Amazon FBA isn’t just about getting inventory from point A to point B. It’s about doing it in a way that protects your products, satisfies Amazon’s strict requirements, and maintains a healthy seller account. By following the step-by-step process outlined above — and avoiding common mistakes such as mislabeled boxes or improper preparation — you can streamline your operations and reduce both costs and headaches. Continue refining your process with reusable templates, automation tools, and regular FBA fee reviews, allowing you to focus on what matters most: growing your sales.